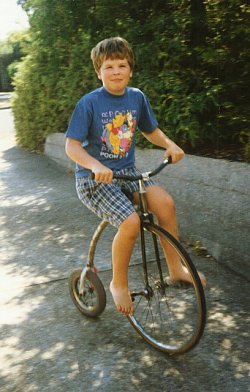
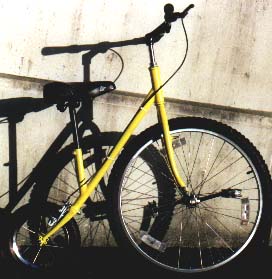
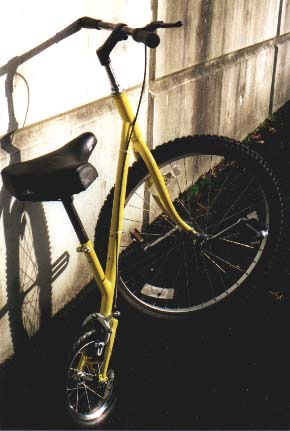
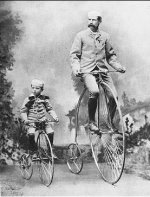
Child's Penny Farthing
 The aim of this project was
to build a High-wheeler for my 8 year old son out of existing
bike parts I have collected. To this end it varies to some degree
from the original Penny Farthings in equipment, especially when
using the normal bike tubed tyres.
The aim of this project was
to build a High-wheeler for my 8 year old son out of existing
bike parts I have collected. To this end it varies to some degree
from the original Penny Farthings in equipment, especially when
using the normal bike tubed tyres.
Sizing
These are much more difficult to size than normal
bikes because one straddles the big wheel so I'm sure my son will
grow out of it quickly.
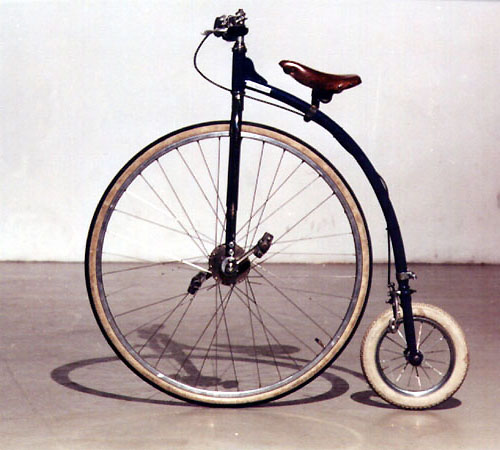
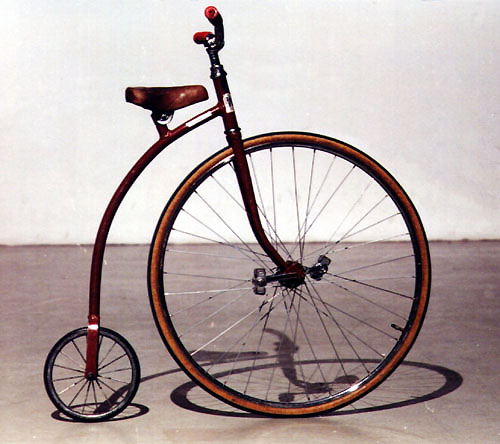
Looking at other Penny Farthings it seems that
the front wheel is roughly 3 times bigger than the rear. My
original intention was to use an 8" ex wheelchair front
wheel on the rear as I thought it was a better proportion but the
one I had was too hard to buy tubes and tyres for so I opted for
the normal 12" bike wheel.
The main tube on most Penny Farthings follow the
front wheel for about 90 degrees and so therefore have a
relatively short wheel base. I'm not sure why really but I
decided to extend the wheel base just a little, maybe in the hope
it will make it tip over forwards less easily. They also have a
steering lock for, I believe, to stop the big wheel burning you
legs if you turn too sharp. I didn't think it necessary in this
case.
Many of the handlebars are bent into the M shape (more like the
McDonalds logo really) to accommodate the rising knees of the
rider. I'll need to go this way too as Chris gets taller.
Brakes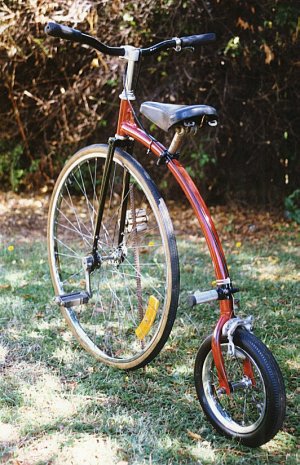
It looks to me like most Penny Farthings have just one brake,
placed on the front and usually the spoon type that press down
onto the hard rubber tyre. I'm not convinced this is a good idea,
especially on a child's version so I skipped the front brake and
placed one on the rear. The rider can resist forward motion just
by forcing back on the pedals. These could/can easily tip over
forwards and so I figure this is as much braking on the front as
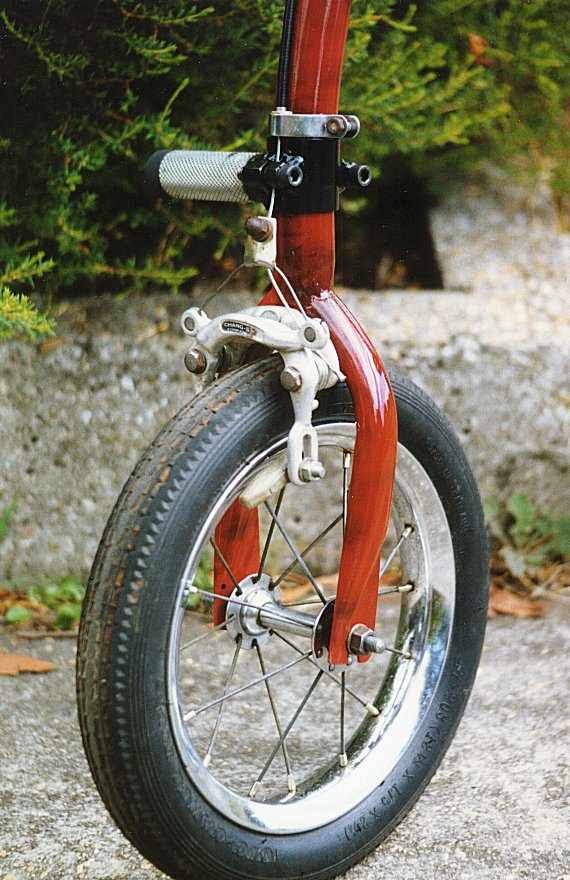
what's needed. The brakes were easy to mount when using normal bike 12" front forks but I ended up
using centre pull callipers to give
less obstruction. The normal callipers placed the brake cable out
where it could be caught by the rider and didn't look as neat.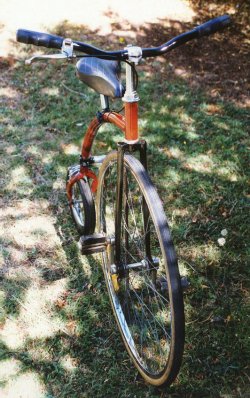
Front Forks
To be honest I haven't had much of a look at existing Penny
Farthings first hand but in all the pictures I could get a hold
of they all seemed to have straight front forks. This was easily
achieved using normal bike forks by placing them in a home-built
press whilst propping up both ends. I expected it to be much more
difficult and was particularly concerned it would kink the tubing
but there was no problems at all and it was done in a minute. The
dropout is simply cut off ready for the home-built bearing mount
to slide up into it.
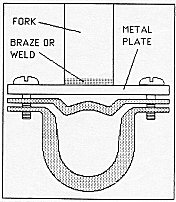
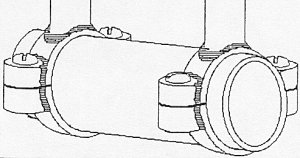
Bearing mount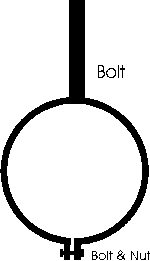
There are several ways to tackle this.
- The bearing mount we made by cutting a piece of tubing
the same dia and width as the sealed bearing to which the
fork will be welded to.
2 small lugs were welded to the tube then split to make a
clamp. Because the wheel needs to be removed from time to
time (EG. changing tyre) this bracket needs to be
removable. This was achieved by welding a bolt onto the
clamp, brazing 4 nuts onto the forks so the assembly
shown in the drawing slides up into,
and is fixed to the forks.
2 other ideas:
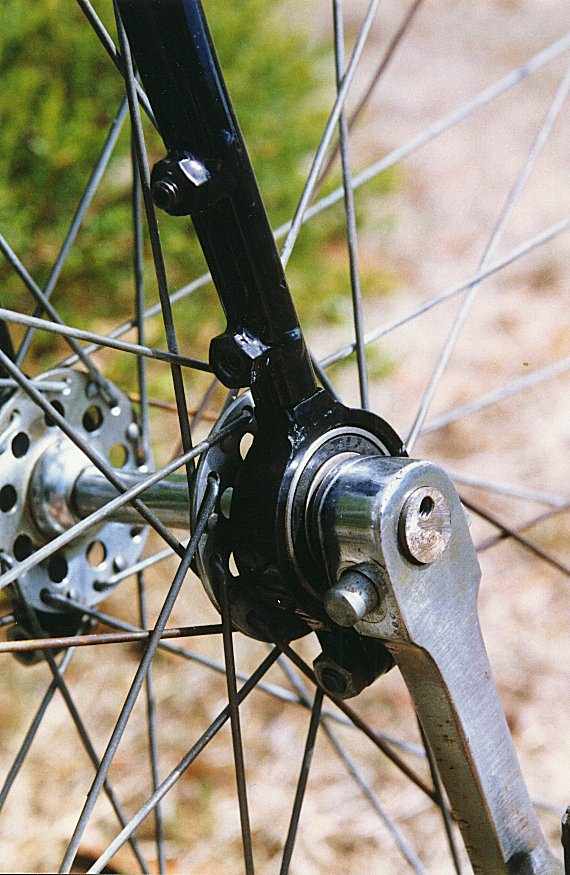
This is the most difficult part of the machine to manufacture.
The pedals are fixed to the hub (no freewheel) - very different
to a normal bike where the same area has bearing races. I'm lucky
to have a friend that has a lathe and was interested in the
project so all of this was made by him - great!! We had 2 goes at
this before we came up with one we totally trusted. My first idea was to make one that could be
removed and put on any bike front wheel. This proved to be much
more difficult than at first thought. We
ended up with - 2 separate pieces were turned up on the lathe
to go each side of the 27" ex bike front wheel where the
pedal cranks mount. They had a hole drilled down their centre so
both are held in place by a rod passing through the hub, welded
to each piece and the hub.
Other ideas
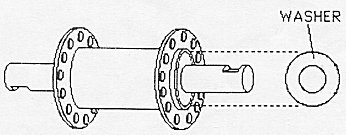 If you don't have
access to a lathe I could imagine it would not be too
difficult to make it this way using a coaster (pedal back
to brake) bike rear wheel and normal bike BB axle.
- Take out all the hub innards.
- Make 2 washers, one for each side of the hub that
will be welded where the ball races were. These
washers will also have the ex bike BB axle
through them and welded.
- Choose sealed bearing cartridges that fit over
the axle.
- The rest of the design as described above.
|
Of course you could make your own hub. 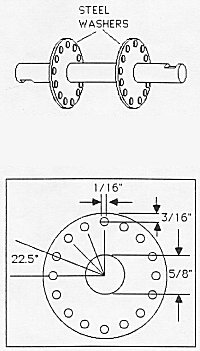
Pattern for drilling steel washers for a 32 spoke rim.
|
Pedals and Crank
A simple subject really except there can be a problem here. I
didn't want to grind off the cog on the set of cranks I had but
this leaves a problem. When I mounted a (normally) left crank on
the right on the Penny Farthing the pedal undoes when in use.
It's interesting to note that the ball bearings must then roll
backwards to the rotation of the pedals for this to undo the
pedals. (does this make sense) Anyway - I'm trying a glue like
locktite to see if that holds the pedal on enough.
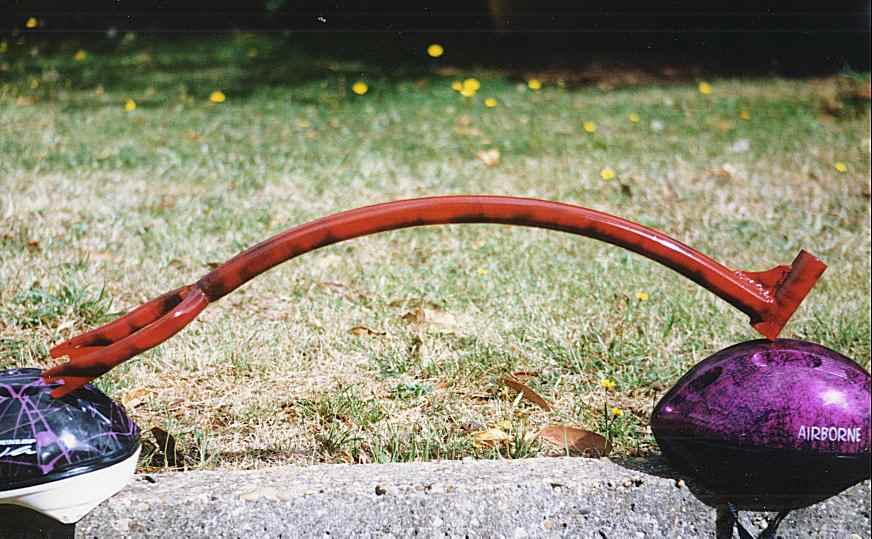
Bending the main tube
This was something I though may be difficult to do without
kinking the tube but proved to be no problem. Along with a friend
we placed a 15" car wheel with a fitted tyre in the vice and
cold bent the tube around the tyre. It took some effort and there
was waste each side of what's used (to get enough leverage for
bending) but that was it. Oh we did draw out the shape onto the
floor with chalk to get the right angles.
Of course there are much
more elegant ways of doing this using pipe benders.
I was a little concerned about the joint between the frame
tube and the steering head after it broke
when being test rode (It was only tack welded though) so I
decided to weld a gusset there to strengthen the area. Not sure
if it's necessary really but I do tend to overbuild sometimes to
be sure
Materials used.
The main tube was an old TV areal
tube I had around of 31mm Dia x 1.5mm thick. All other parts
(except the foot peg mount, seat mount and lathed front axle pieces) are
standard bike parts. I'd prefer to have a much thinner rear tyre
to match the front but am unable to source one here as yet.
| Rake |
14 degrees |
| Trail |
75mm |
| Weight Distribution |
Front 54% Rear 46% |
| Wheel Base |
590mm |
| Gear Inch |
27" (of course) |
| Pedal crank length |
100mm |
| Seat height |
820mm |
Riding
Does it need a footpeg? I wasn't sure at first but now that I
added it I'm sure it's the best way to get on and off easily. To
get going one puts the left foot on the peg and pushes along not
unlike riding a scooter.(5 sec MPG
video Viewing size 320 x 200, 410k) After a few kicks you
swing up and onto the seat whilst timing so you can put your feet
on the pedal and push away.
It has quite quick steering, probably because the front forks
were bent straight which reduced the trail but my son doesn't
find it difficult to ride. From new it took him a little time to
get on smoothly and because it tips over forwards easily it took
a few mishaps to learn to lean back on large bumps but other than
that all has been fairly painless up till now.
Conclusion
It certainly attracts interest so don't build one if you don't
want the rider to be noticed.
I'd like to know still
- Can it be ridden backwards? (as it has a fixed hub)
- Is it an easy step before riding a uni-cycle?
- If there is a tandem Penny Farthing around.
| |
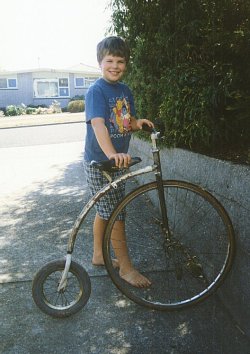
Just about the right size.
|
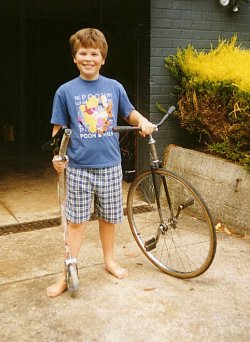
In testing the tack welds broke and
Chris was dumped on the ground. Believe me he wasn't
smiling till I took the picture. Note the first small
rear wheel used.
|
 |
 |
 |
So who else is doing this?
Over the years I've come across a few others. If you can
identify the source please let me know so I can acknowledge them.
Also check out a nice Mini-HiWheel
from Rideable Bicycle Replica's, Inc.
And Books
Bicycles & Tricycles: an elementary treatise on
their design and construction by Archibald
Sharp is a great place to start. 1862-1934, Cambridge, Mass : MIT
Press.
Video Pics of the machine in action
[ Home ] [ Ally] [Stamp FAQ] [ HPV Index ] [ Design overview ] [ Bike 1] [ Bike 2] [ LWB Bike] [ SWB Trike ] [Electrified
20" Tadpole trike] [ Childs Trike ] [ SWB Trike 2 ] [ Electric Trike ] [ RWS Trike ]
[Delta Trike] [Childs Hi-Wheeler] [ Bike Trailer ] [Recumbent bike trailer] [Power Trailer] [ Steering Diags ] [ Steering Mounting] [ Kingpin Diags ] [Novel HPV Ideas] [ Australian HPV Resource ] [ Links ] [Power Assist] [ Unusual Vehicles ] [ Electric RC Models ] [ EV Circuit Diags ] [Tas HPV] [QLD PP] [Qld HPV] [Skycycle] [Bleriot] [Building HPV's] [Darryl] [Null Modem] [ Pedalezy ] [ USPD ] [Zeta] [Power Attachment] [Email]
Friday, January 30, 2009

