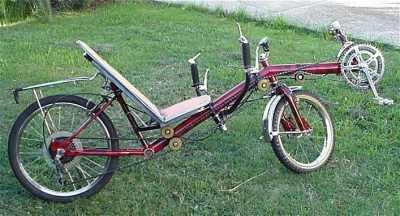
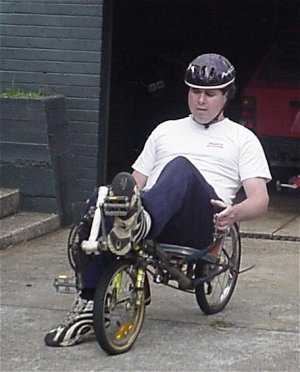
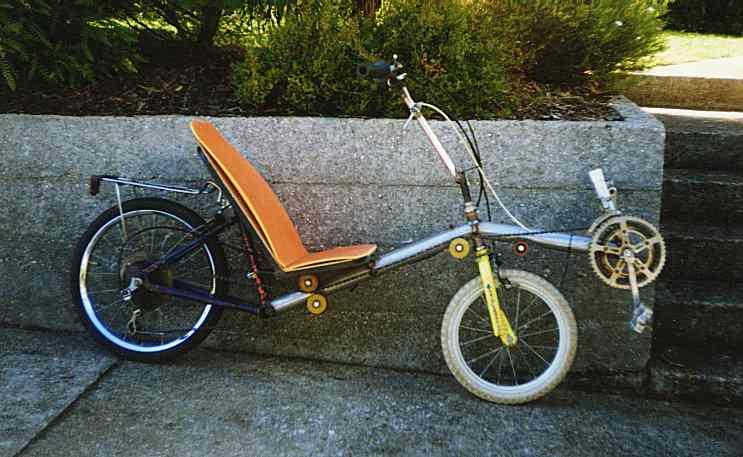
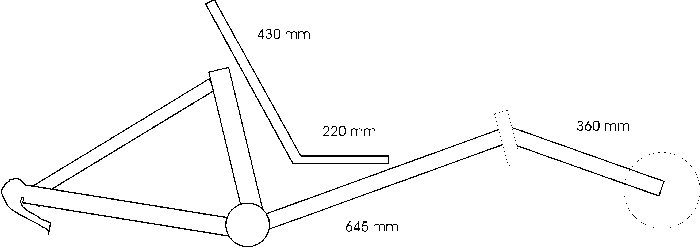
The bike is made mainly from 16 and 20" acquired bike
parts and car exhaust tubing.
My original intention was to have just one skate wheel to route the chain but this didn't work out. Many Recumbent low-racers have the chain travelling beside the front forks - not sure how they do it as on this one the chain would run on the fork leg. Looking closely at some of the pictures it looks like they curve in the fork where the chain passes and/or offset the BB so the chain is held out off the fork more than is normal.
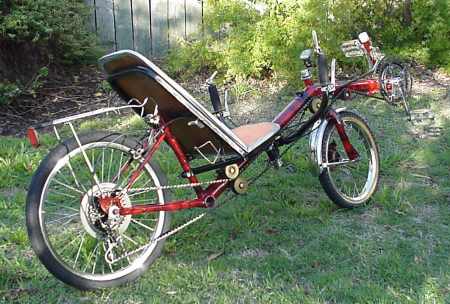
Seat - Tried to cut down on weight here so used thin 3 ply for the base and a camping mattress for the padding. It's deceivingly comfortable actually, fine for rides of an hour or 2 but needs a lot more thought to make it look more appealing. The metal frame is an old kitchen chair, square tubing that is quite thin.
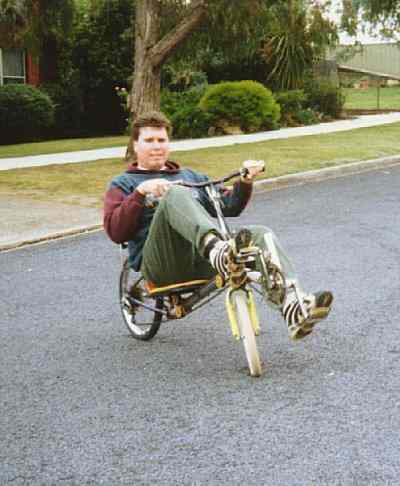
 Handling
is a little quick, probably no more so than other SWB models
though and still stable at speed. (at least up to 80K/hr) There's
a little heel interference with the front wheel and front brake
callipers at full turn but I was keen to make it as long a wheel
base as I could.
Handling
is a little quick, probably no more so than other SWB models
though and still stable at speed. (at least up to 80K/hr) There's
a little heel interference with the front wheel and front brake
callipers at full turn but I was keen to make it as long a wheel
base as I could.
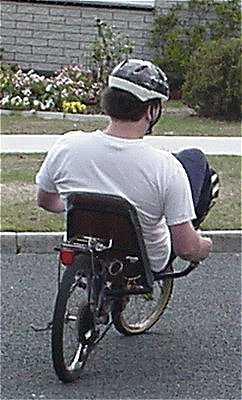
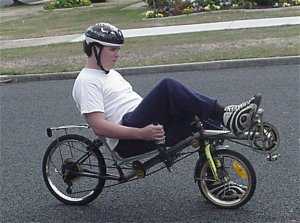
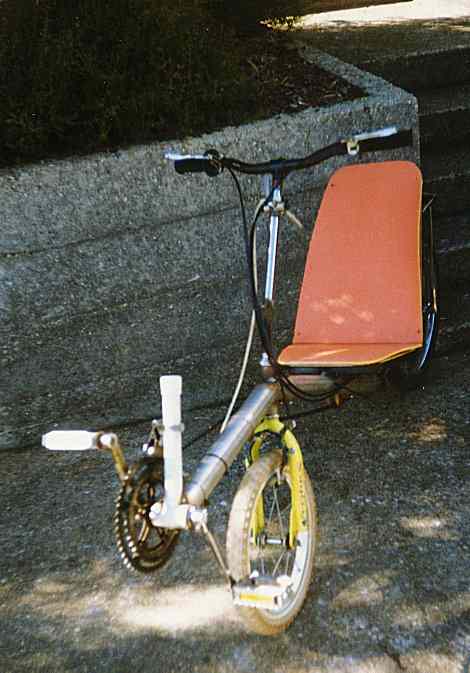
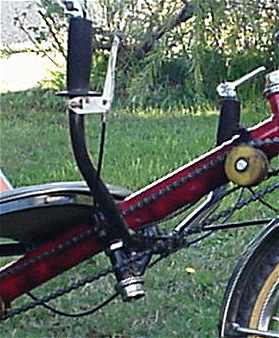
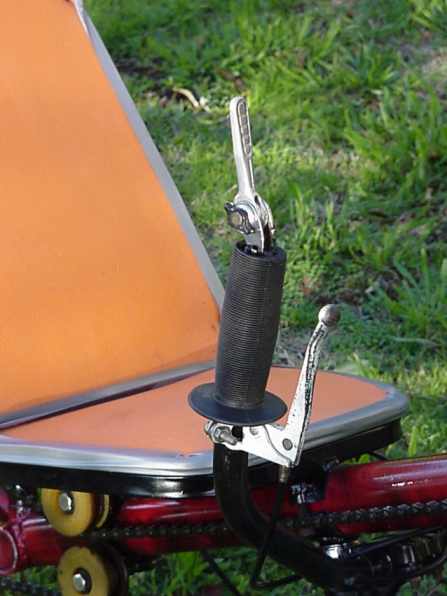
Steering - The bike was first made with above seat steering. See pic 1, pic2, pic 3. There can easily be clearance problems with USS, especially when the machine is quite low but I decided this was where I was wanting to head.
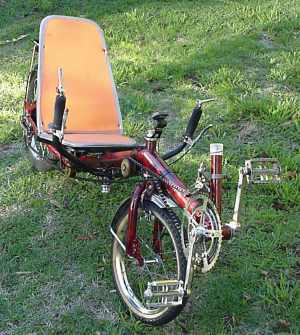
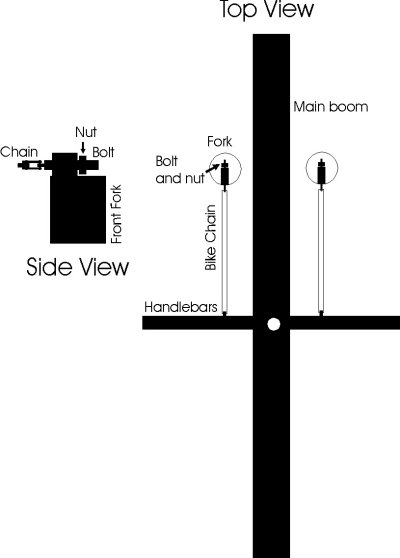
Then I thought about trying out this under-seat
system design - The idea is to use bike chain to connect the
handlebars to the forks. A tube is welded to the top of each fork
crown so that bolt can pass through it. The bolt is used to
tension the closed loop system. The end of the bolt is flattened
out, a hole drilled into the end so that the chain can be clamped
on as they usually are using the chain pins. On the handlebar
side either a lug is welded onto the bars or a metal strap
wrapped around the bars with the chain clamping on again with
it's own pins as usual. All of this looks like it would work but
I ended up going the solid rod way. 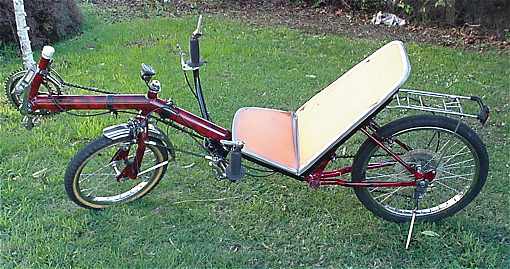
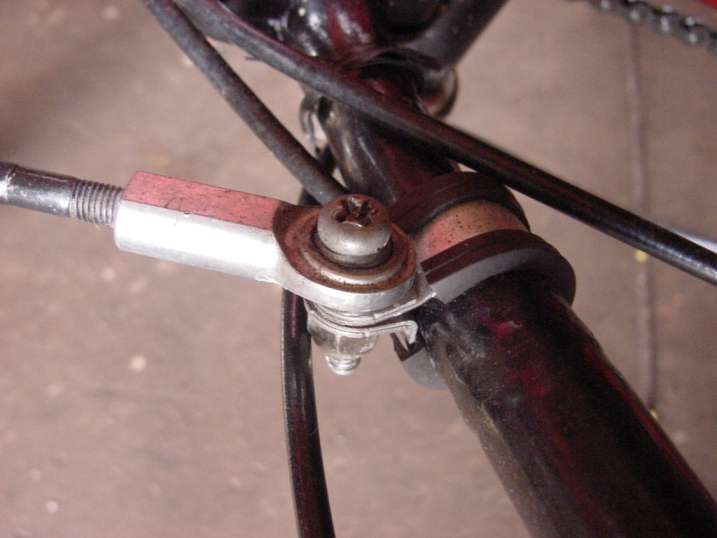
Handlebar mount - The handlebars were mounted as described here, option 5. The difference is I added to the tube a bike steering head clamp (see another pic) but am now regretting it. I've found it places the steering rod pivot out in front of the handlebar pivot and makes the steering path non-linear. A metal strap with rubber insert (bought from a tool shop) wraps around the bars and the steering rod bolts to it. Might go back to the original design.
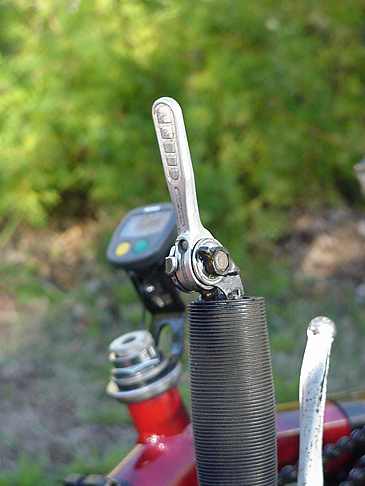
Gear shifting - Bar end shifters have really fascinated me and seem like the way to go but I can't afford to buy them (at $120 a piece) so I had a go at making them myself. Here are some closeups Pic 1, Pic 2- It wasn't a complete success - well there are limitations I found as I made them but I think they're better than what I had before when they were mounted on a short steering stem in the more conventional place through the forks. Check here for additional info.
The things that aren't so good are:
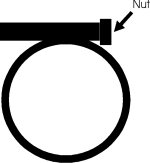
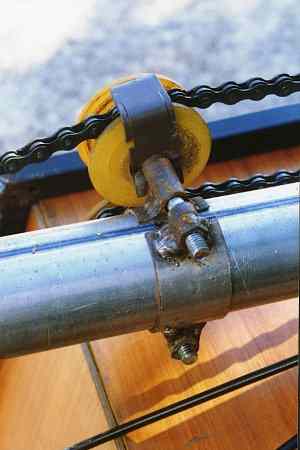
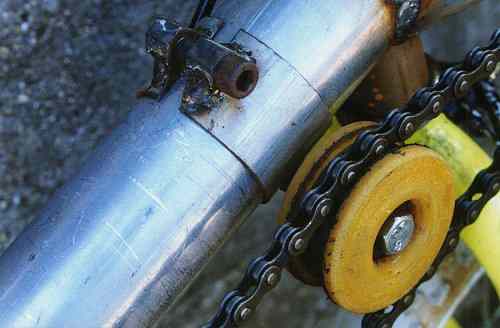
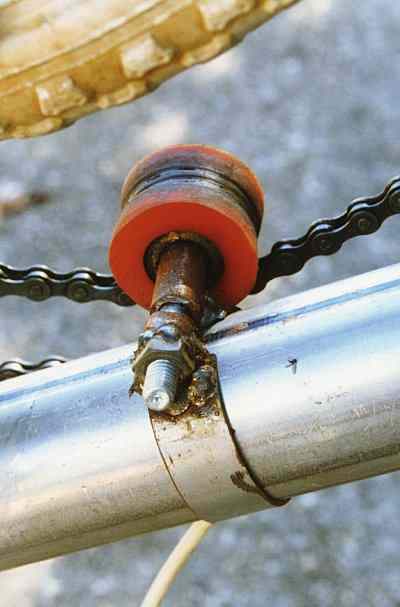
  Chain Guides - All of these
straps use the same size tubing or next size up as what
they're mounted on. The strap is made by cutting about a
40mm wide piece of the large tubing. Weld on a small tube
along with a nut at the end of that tube. Alternatively
use a long nut. Chain Guides - All of these
straps use the same size tubing or next size up as what
they're mounted on. The strap is made by cutting about a
40mm wide piece of the large tubing. Weld on a small tube
along with a nut at the end of that tube. Alternatively
use a long nut.Split both tubes with a hacksaw to make the clamp gap.
If using the long nut, drill out the thread on the side
with the longest tubing. On a few occasions I've found I
needed to split the tubing first and open the gap a
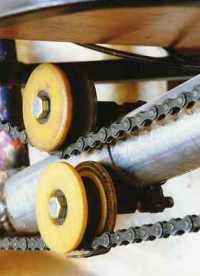
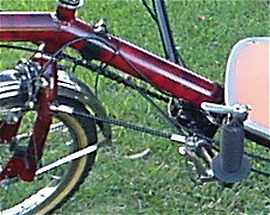
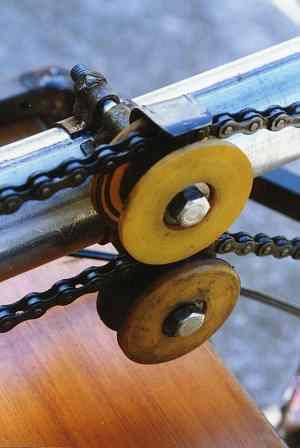
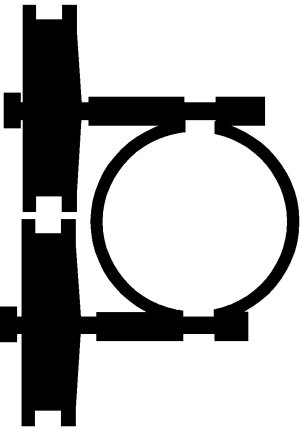
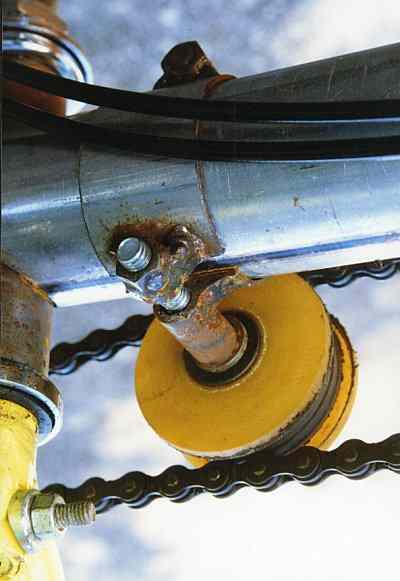
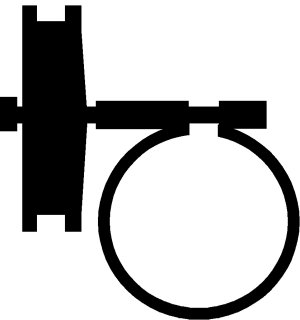
little before welding on the mount tube. Using 2 wheels on different sides. See pic 1, pic 2, and drawing. I mount the wheels close enough to capture the chain so it can't jump the groove.
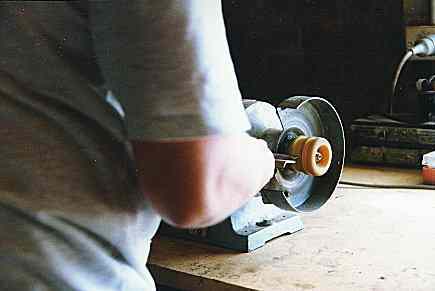
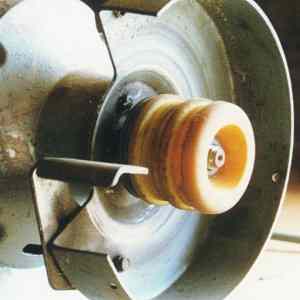
Skate wheels are used, see these pic1, pic2 on how to grind the groove. These 2 wheels were made close enough together so the chain is captured in the groove. N.B. Some of these pictures are taken upside down) |
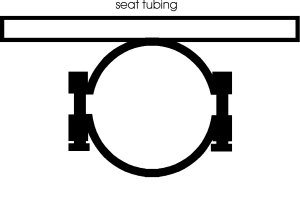
 Seat
mount (shown upside down) Seat
mount (shown upside down)  The strap is made by cutting about a 40mm
wide piece of tubing the same size as the boom to which
it will be mounted on. Weld on a long nut each side of
the tube or alternatively use a small tube and weld a nut
at the end. |
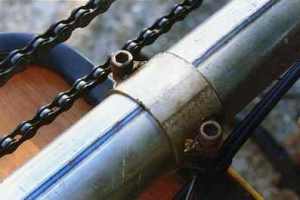
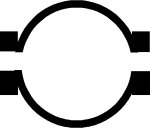
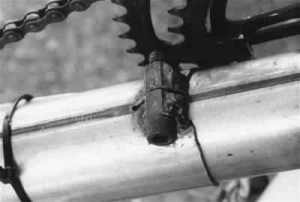 Boom clamp. In the past I have used an external clamp but found this to be a lot lighter and easier to make. All the commercial ones I've seen that have this also have 2, I can see why now as it slipped with one so I've also added the extra one. A long nut is welded to the tube then both split down the centre. The thread on one side is then drilled out. |
|
|
||||||||||||||||||||||||||
Video Pics of the machine in action
|
|||||||||||||||||||||||||||
 |
 |
||||||||||||||||||||||||||
 |
|||||||||||||||||||||||||||
[ Home ] [ Ally] [Stamp FAQ] [ HPV Index ] [ Design overview ] [ Bike 1] [ Bike 2] [ LWB Bike] [ SWB Trike ] [Electrified 20" Tadpole trike] [ Childs Trike ] [ SWB Trike 2 ] [ Electric Trike ] [ RWS Trike ] [Delta Trike] [Childs Hi-Wheeler] [ Bike Trailer ] [Recumbent bike trailer] [Power Trailer] [ Steering Diags ] [ Steering Mounting] [ Kingpin Diags ] [Novel HPV Ideas] [ Australian HPV Resource ] [ Links ] [Power Assist] [ Unusual Vehicles ] [ Electric RC Models ] [ EV Circuit Diags ] [Tas HPV] [QLD PP] [Qld HPV] [Skycycle] [Bleriot] [Building HPV's] [Darryl] [Null Modem] [ Pedalezy ] [ USPD ] [Zeta] [Power Attachment] [Email]
Friday, 30 January 2009